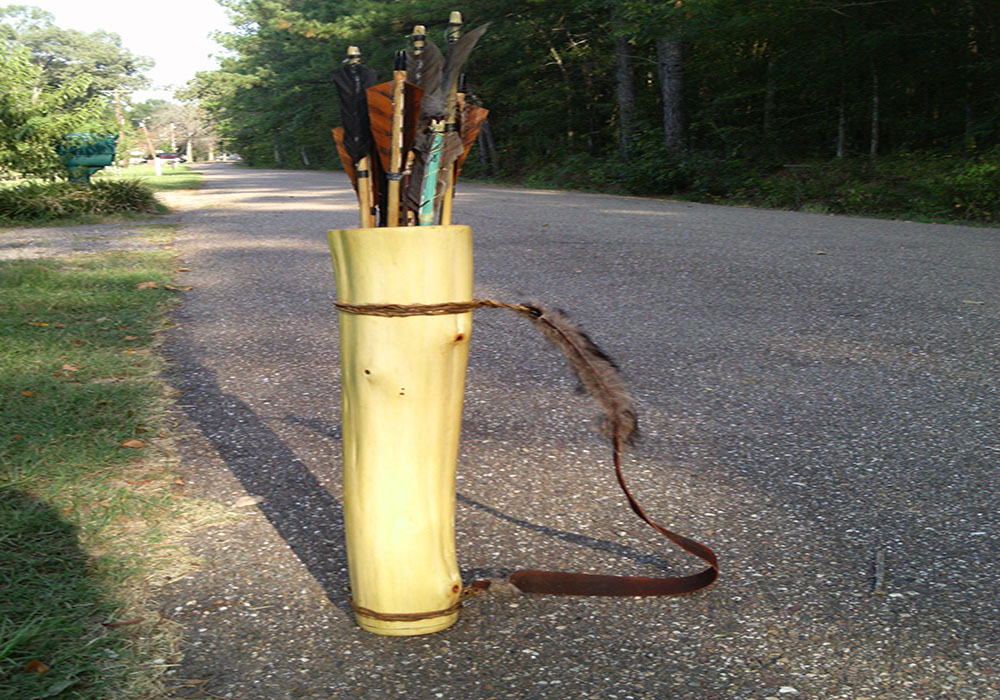
Hi, my name is Robert and this is my first instructable. My project is to build a wood quiver. Let me start off by saying that i am not an expert woodworker. I’ve only built a handfull of bows, and this is my first attempt at a quiver.
What you need:
-saw(i use a miter and hacksaw)
-chisel
-tape measure, ruler
-wood glue(i like titebond III)
-pencil
-sandpaper and,or files
-stain
-knife
-either band saw, drill bit, or wood split
wedge and sledge hammer
-your wood
-a design
Step 1: Select the Wood
– Now cut to size and remember to leave about 1/2inch extra.
– Cut that 1/2inch off and you should have what looks like a cup coaster. Its not a coaster, it is your bottom that will be glue
on later after the log is hollowed.(pic3 piece on bottom)As you see I cut my wood to 30in with a hacksaw, although my finish product will be around 26in. It is easier to take away wood and quite a bit harder to add more.
Step 2: Remove Bark and Seal
-Ceder is a knotty wood. You can either file or sand away the knots flat, or do like me and I just rounded the sharp edge off. I think the knots give the wood character(pic4).
-If the wood your are using is dry and seasoned then do not worry about this step. I’ve read that it takes roughly a year for wood to be seasoned. So if the fallen limb, firewood, or tree has been cut within a year, it is time to seal the wood. I use wood glue for this step and rub every square inch of the log with glue using my finger. I cover the complete log.(pic5)
**this step does not sound important but if the wood checks(splits from releasing moisture) it could ruin your project.
Step 3: Cut, Hollow, and Glue
1. Use a drill bit to drill the log hollow. I bought a bit and extension because this was my first plan. I drilled about seven inches
and is was to hard for the drill. An auger bit would probably work better.
2. The second method would be to split with a wood wedge and sledge hammer. You can get a wedge at a hardware store. Draw
a line in the middle of the log, line up the wedge with the line, and strike with the sledge until the log is split.(wear safety eyeware)
3. The third method is what I show to do. First cut the log in half using something like a bandsaw. I used a table saw and cut it
right down the middle(pic 1) and lets just say it was not a good decistion. It is way to dangerous.After the wood is split or cut, it is time to hollow. I used a simple chisel, sizes .5″, .75″, and 1″. Be sure to draw outlines on the wood(pic 2) limiting yourself from taking to much wood, and making sure enough is removed. My wall was to be 1/2in thick. I found myself using the 1/2inch chisel more because it is more precise. If the wood splits were it is not suppose to do not worry to much. You can glue it with wood glue and squeeze it back together. It happend to me twice.ITS HOLLOW(pic3)
Time for the Glue. A glue like Titebond III should work fine, although I used Urac-185. Urac is a two part epoxy and the reason I chose it is because the glue expands and fills gaps. My chisel was not perfect so the glue filled in my mistakes. You can get any two part epoxy at Lowe’s but not Urac. So choose your glue and apply(pic4). Remember to apply more than enough glue to all three pieces. Its easier to apply once than to not apply enough and fix it. Now line the two pieces together perfectly and hold tight. I wrapped the log with twine to hold it tight(pic5).
Step 4: Finish
The glue should be dried for at least 24 hours or recommended time on bottle.
-After the glue dried, I cleaned up the glue lines with a file. I was just removing the extra glue. I also removed the wood glue we
applied earlier to seal the wood.
-(pic 1) I took a circular file a made a groove were my straps will be attached to the log.
-Now its is time to sand the log so the stain will take well. I sanded the wood with 100 grit first and then again with a finer
sand paper 220 grit.
I decided to put a clear finish on the wood. In my opinion, the cedar looks best natural. Three coats of finish later, with fine sanding in between coats, I was finished(pic3). Now we can stop calling this thing a log and call it a one-of-a-kind quiver. Now it is time to customize the quiver.(next page) You can almost guarantee that no one else will have one of these. Looking back you could also use this hollow log for something else like a birdhouse or planter.
**Remember, if your wood was green do not ever leave this outside in the sun or around a heat source for at least a year or it
might split..
Step 5: My Cedar Quiver
-(pic3) shows a close up of what attaches the strap to the quiver. The attachment is twisted rawhide string with a loop i made from a
rawhide dogbone stained with a tea bag.
-(pic4) Is a close up of the leather strap I picked up at a craft store for a couple of dollars. I glued on fur with titebond for comfort and
and looks on the leather strap.
-(pic5) shows the inside were I also attached fur to protect the feathers and keep the arrows from ratteling.Well I hoped you enjoyed my instructable. Thanks for looking.


